Email marketing is one of the most effective ways to reach your customers and drive sales. But how do you know if your email campaigns are actually working? That’s where Google Analytics 4 (GA4) comes in. With GA4, you can track and analyze your email campaigns to gain valuable insights and improve your strategy. In this blog post, we’ll show you how to use GA4 to track and analyze your email campaigns.
Step 1: Set Up GA4

The first step is to set up GA4 on your website. This involves creating a GA4 property and adding the tracking code to your website. Once you’ve set up GA4, you can start tracking your website traffic and other key metrics.
Step 2: Create UTM Parameters
UTM parameters are tags that you add to your links to track the source, medium, and campaign name of your traffic. By using UTM parameters, you can track how much traffic is coming from your email campaigns and how well they are performing.
To create UTM parameters for your email campaigns, use Google’s Campaign URL Builder. Simply enter your website URL, the source (email), the medium (email), and the campaign name. This will generate a unique URL that you can use in your email campaigns.

Step 3: Create an Email Campaign Tag
The next step is to create a tag in GA4 for your email campaigns. To create an email campaign tag in GA4 (Google Analytics 4), follow the steps below:
- Sign in to your GA4 account and select the property where you want to create the email campaign tag.
- Click on the “Admin” button in the bottom left-hand corner of the screen.
- In the “Property” column, click on “Data Streams” and select the data stream associated with the email campaign.
- In the “Measurement” column, click on “Events” and then click on “Create Event.”
- Enter a name for your email campaign tag in the “Event name” field, such as “Email Campaign.”
- In the “Event parameters” section, add a parameter for the source of the email campaign, such as “utm_source=email_newsletter.”
- Add additional parameters as needed, such as “utm_medium=email” for the medium or “utm_campaign=spring_sale” for the campaign name.
- Click on “Save” to create your email campaign tag.
Once your email campaign tag is created, you can apply it to your email campaigns by adding the parameters to the links in your emails. When someone clicks on a link with the tag parameters, the event will be tracked in GA4 and you can view the results in the “Events” section of the reporting dashboard.
Step 4: Set Up Email Tracking
Now it’s time to set up email tracking in your email marketing platform. This will allow you to track the performance of your email campaigns in GA4. The process for setting up email tracking will vary depending on your email marketing platform, but most platforms will have instructions on how to set up tracking.
Once you’ve set up email tracking, you can start sending out email campaigns with UTM parameters and tracking tags.
Step 5: Analyze Your Email Campaigns
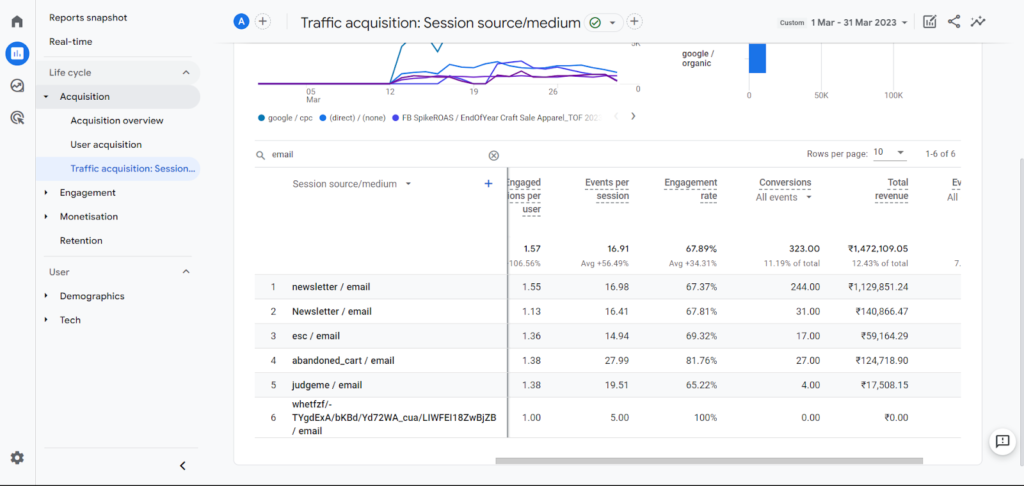
Now that you’ve set up tracking for your email campaigns, it’s time to analyze their performance. In GA4, you can view your email campaign data by going to “Reports” and then selecting “Acquisition” and “Campaigns.”
Here, you can view metrics such as the number of sessions, the bounce rate, and the conversion rate for each email campaign. You can also view the source and medium for each campaign and drill down into the performance of individual campaigns.
By analyzing your email campaign data in GA4, you can gain valuable insights into how well your campaigns are performing and identify areas for improvement.

Conclusion
Email marketing is a powerful tool for reaching your customers and driving sales. But to get the most out of your email campaigns, you need to track and analyze their performance. With GA4, you can easily track your email campaigns and gain valuable insights into how they are performing. By using UTM parameters, email tracking, and campaign tags, you can gain a deeper understanding of your email marketing strategy and make data-driven decisions to improve your campaigns.
